
We show you how to resolve the most common macOS 11 Big Sur issues, from download troubles to installation issues. Spoiler alert: it’s not as difficult as you think!
You are not alone if you are still encountering a variety of macOS 11 Big Sur problems after making a move. Although the operating system was released in November 2020, some Mac users still have issues. While many saw the advent of macOS 11 as a long time coming, it’s been a mixed bag in terms of the benefits and issues some users have encountered.
If you’re still experiencing macOS 11 Big Sur problems, don’t worry; in this tutorial, we’ll walk you through simple methods to resolve all of the most prevalent issues. After that, you can rest and enjoy the benefits this operating system offers. And there are many of them!
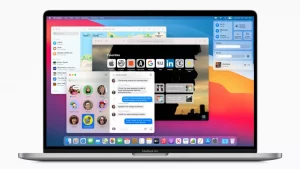
MacOS 11 Big Sur was the most significant advancement in Apple’s operating system in a long time, distinguishing it from earlier editions. And with its release came the first M1-equipped computers, ranging from the Mac mini (M1, 2020) to the MacBook Air (M1, 2020) and MacBook Pro 13-inch (M1, 2020), all of which Big Sur was designed to take full advantage of.
While macOS 12 Monterey is no longer the new kid on the block, any modern operating system still has certain flaws that need to be worked out. Downloading and installation issues are two of the most commonly reported problems. However, complaints about hardware and software not operating correctly have also been high on the list of reported cases.
The majority of macOS 11 Big Sur problems are simple to resolve. Usually, it’s just a question of your Mac needing a reboot or running out of storage space. Still, problems can also arise if you’re using outdated software or if your Mac is old and incompatible with the new operating system. In any event, this article will assist you in determining how to tackle the problems you’re having.
How to Repair macOS Big Sur Download problems
One of the most common macOS 11 Big Sur issues is that macOS 11 fails to download, with some users receiving an error message stating “Installation failed.”
Others, on the other hand, encounter “The network connection was lost” errors when attempting to download macOS Big Sur.
But that’s not all. Some users see the following error message: “Installation of macOS could not proceed.” It is because important content must be downloaded before installation. That content is not currently available for download. “Please try again later.”
There are many causes for this issue. First, it could be because many users are attempting to download macOS Big Sur simultaneously. If you believe this is the case, try again at a non-peak period to see if the download works. You can also check the Apple Server’s live status (opens in a new tab) to ensure everything is in order on Apple’s end.
MacOS 11 Big Sur Issues: How to Resolve Them
There should be a macOS Software Update’ area. There is no problem if it has a green dot, but other colors indicate that Apple is having difficulty providing the Update. Another possibility is that your machine may not have enough disc space. For example, a macOS download will usually fail if you do not have adequate storage space on your Mac.
To double-check, open the Apple menu and select ‘About This Mac.’ Next, select ‘Storage,’ then double-check that you have adequate space on your hard disc. You must have at least 15GB of free space. If you’re running low on disc space, open the Apple menu, select ‘About this Mac,’ then go to Storage > Manage to free up some space. To guarantee your internet connection is as reliable as possible, consider moving from a Wi-Fi connection to an Ethernet cable.
If you’re still having trouble installing macOS Big Sur, look on your hard drive for the partially downloaded macOS 11 files and a file called ‘Install macOS 11’. Delete these, then restart your Mac and attempt again to download macOS Big Sur.
If that doesn’t work, open the App Store and go to ‘View My Account’ to see if anything is in the ‘Unfinished Downloads’ column. From there, you may be able to restart the download.
Finally, log out of the Store and see whether the download restarts.
How to Resolve the “gateway timed out” Error While Downloading macOS Big Sur
Furthermore, one of the most common macOS 11 Big Sur problems that have garnered a lot of complaints has been the download pausing and the system displaying a “gateway timed out” or “bad gateway” message.
If you are experiencing this problem, boot your Mac in Safe Mode (hold down Shift on the keyboard while it boots), then download and install macOS Big Sur again.
How to Troubleshoot macOS Big Sur Installation problems
If you’re having trouble downloading macOS Big Sur, read our how to download and install macOS Big Sur article, which will walk you through the steps you need to follow to install the new operating system securely.
Firstly, make sure you have a Mac that can run macOS Catalina. The following Macs are supported:
- MacBook 12-inch (2015 and later)
- Air MacBook (2013 and later)
- Apple MacBook Pro (Late 2013 and later)
- Mini Mac (2014 and later)
- iMac (2014 and later)
- Apple iMac Pro (all models)
- The Mac Pro (2013 and later)
If you have a suitable Mac and the macOS Big Sur download completes but there is no prompt for the installation to proceed, look in your Mac’s program folder for a file called ‘Install macOS 11’. Double-clicking the file should start the installation process.
If you encounter the macOS Big Sur installation failure owing to insufficient disc space, restart your Mac and use Control + R while it is booting to enter Recovery mode. To boot normally, select ‘Disk boot,’ then delete any extra files to free up space.
macOS Big Sur is stuck on the ‘Setting Up Your Mac’ screen.

If you’ve installed macOS Big Sur but your Mac is stuck on the ‘Setting Up Your Mac’ prompt, you’ll need to restart your Mac or MacBook. Don’t worry; the ‘Setting Up Your Mac’ notification indicates that the Update is complete, so continuing your Mac will not result in data loss or damage.
Hold the power button for a few seconds until the Mac or MacBook shuts off. Then, please wait a few seconds before turning it back on. Your Mac or MacBook should now successfully boot into macOS Big Sur.
If you’re having trouble freeing up disc space, look for hidden Time Machine files that may take up a lot of space.
Retry the installation once you’ve freed up enough space.
If macOS Catalina experiences difficulty at the end of installation and displays an error message, restart your Mac and press Command + Option + R on your keyboard while the Mac boots to launch the recovery system over the Internet. Shift + Option + Command + R is another option.
If your Mac still doesn’t boot, use Apple’s instructions to make an external Mac starting disc (opens in a new tab).
To resolve the issue, restart your Mac in Safe Mode and then attempt to install macOS 11 Big Sur from there.
How to Resolve Mac OS X Big Sur Login Issues
If you’re experiencing problems logging into your Mac or MacBook after installing macOS Big Sur, or if you’re trapped in a loop where you log in, then log out, the procedures below may be helpful.
Restart your Mac while holding down the Command + S buttons on your keyboard.
It will launch a command prompt. Enter the following now:
mount -up /sbin
Enter your keyboard shortcut. Then type the following:
rm.applesetupdone /var/DB
It deletes a file, making it appear like you’re starting Big Sur for the first time. Don’t worry; nothing crucial will be lost. Enter, and then restart your Mac.
You will then be immediate to establish a new administrator user account.
After upgrading to Big Sur, MacBook fans became noisy.
Some users have reported that their MacBook fans have grown substantially louder after updating macOS Big Sur.
It is likely because the MacBook is still hard at work behind the scenes updating the remainder of the operating system, including updating programs and re-indexing the Finder. It may trigger the fans to activate to keep the MacBook cool. Hopefully, the fans will return to normal in a few hours.
Is macOS Big Sur sluggish? Here’s how to repair it.
After installing macOS Big Sur on your Mac or MacBook, you may notice that it runs slower than before.
If macOS Big Sur also displayed a message that said, “Optimizing Your Mac: Performance and battery life may be impacted until completed,” this is typical, as macOS Big Sur is performing tasks behind the scenes that may initially harm performance.
After a day, your Mac should be as good as new (if not better). If you haven’t noticed an improvement by then, restart your Mac or MacBook.
Another thing to double-check is that all of your programs and software have been updated to the most recent version. If any of them are having problems with Big Sur, it may slow down your machine.
If you have a new MacBook or Mac with Apple’s M1 chip, you may be utilizing software that has not yet been optimized. While Apple’s Rosetta tool assists in running software for Intel-based Macs on Apple M1 machines running Big Sur, some performance difficulties may still exist. To update the latest versions to see whether an update for M1 Macs has been issued.
You can also go to the Apple menu and choose ‘System Preferences.’ Click ‘Users & Groups’ in the window that displays. Select ‘Login Items,’ then select the apps you want to prevent from starting upon startup and click the small minus sign at the bottom of the list.
It is also a helpful idea to keep your apps up to date. Check the App Store or the app’s website for any available updates.
You can try restarting your Mac to see if it makes a difference. If that doesn’t work, force-quit any apps that look to be using a lot of RAM. These can be identified by using Activity Monitor (under /Applications/Utilities) to determine which apps and processes consume the most CPU or RAM. Its CPU tab displays the status of active processes in real-time.
To force-quit an item, choose it from the Activity Monitor list, click the X in the toolbar’s left corner, and confirm you wish to force-quit.
- Delete the cache as well. Open the Finder window, go to the top menu, and choose ‘Go to Folder.’
- Enter /Library/Caches in the text box that opens.
Remove the data from each folder. Rep the procedure with /Library/Caches. Running the Repair Disk tool from within Disk Utility may also be beneficial, and for further alternatives, see our How to Speed Up Your Mac guide.
How to Resolve macOS Big Sur Battery Issues
As with the previous performance issues, you may notice that your MacBook’s battery life is significantly reduced at first. But, this is most likely due to macOS Big Sur performing some background work to set itself up – and after a few hours or a day, everything should have settled down, and your battery life should be back to normal.
If it isn’t, ensure all your apps are up to date. You can also click the battery icon in the top menu bar to see which apps and processes are consuming a lot of your battery life. Close those and check to see if the battery life increases.
If it does, ensure that the programs in question have been updated and examine any of their settings to determine why they are using so much battery life in macOS Big Sur.
How to Troubleshoot macOS Big Sur Mouse problems

If you installed macOS Big Sur and your mouse no longer works, open Finder and navigate to the /Library/Preferences/ directory, then pick and delete the following files:
- com. apple.AppleMultitouchMouse.plist
- com.apple.driver.AppleBluetoothMultitouch.mouse.plist
To get the mouse to operate, you may need to restart your Mac.

How to Resolve Bluetooth Issues with macOS Big Sur
To resolve Bluetooth device difficulties with macOS Big Sur, launch Finder and select ‘Go’ from the top menu, then ‘Go to Folder…’. Enter ‘/Library/Preferences.’
There should be a file called ‘com. Apple.Bluetooth. List there. Select and delete the file (or move it to a safe location), then restart your Mac and reconnect your Bluetooth device.
How to Repair macOS Big Sur Boot problems
If you’ve installed macOS Big Sur, but your Mac won’t boot, restart it and hold down Command, Option, P, and R to reset the NVRAM (non-volatile RAM).
Hold down the key until the computer restarts, and the startup chime sounds for the second time. When you hear the second startup chime, release the keys. Hence, the PRAM will also be reset.
While in Safe Mode, use Disk Utility to check if it resolves any macOS Big Sur boot problems.
Check out our instructions on using OS X boot options to troubleshoot your Mac and how to fix a Mac that won’t start for more information.
Apps will not function in macOS Big Sur.
One of the most contentious changes in macOS Catalina (and still present in Big Sur) is removing support for 32-bit programs. As a result, apps that do not have a 64-bit version will no longer work.
Transmit 4.1.7, 1Password 2.12.2, iStats Menu 2.9, and QuickBooks 2015 are among the apps that will be removed by macOS Catalina (and thus Big Sur). The Tape Drive has a complete list of the apps (opens in a new tab).
While most programs should receive 64-bit updates, many will not, which is terrible news if you rely on them and upgrade to macOS Big Sur.
If you’re worried that the software you rely on won’t operate in macOS Big Sur, check to see if you have any 32-bit apps installed.
To do so, go to the top of your screen and click the Apple icon, then pick ‘About This Mac.’ Next, go to the ‘Software’ section after clicking ‘System Report.’
When you click ‘Applications,’ you’ll see a list of apps. In addition, a column labeled ’64-bit (Intel)’ will appear. If an app has a ‘No’ in that column, it will not be supported on macOS Big Sur.
You can also check The Tape Drive(which opens in a new tab) to see whether your programs are featured. If you have any 32-bit software installed, you should check to see if a 64-bit version is available (if the app has a website, it should say whether one is available).
If not, you’ll need to locate another app that does the same thing but is 64-bit. Again, you can get aid from our list of the greatest Mac apps.
How to Troubleshoot macOS Big Sur Wi-Fi problems
If you’re having trouble connecting to the Internet after installing macOS Big Sur, either via Wi-Fi or an Ethernet (wired) connection, try restarting your Mac in Safe Mode.
It suggests you have a problem with an app or extension installed if you can. Check that your drivers and apps are up to current, and keep looking for an Apple update in the future.
FAQ
How can I install macOS Big Sur?
First, ensure that your device is compatible with Big Sur. Then, select the Apple menu > System Preferences > Software Update.
If it is your first time installing Big Sur, choose Upgrade Now and follow the on-screen instructions.
How do I install macOS Catalina?
Go to the Apple menu > System Preferences > Software Update to upgrade to macOS Catalina. Alternatively, check the option next to Automatically keep my Mac updated to have your computer download updates as they become available in the App Store.