NAS is a typical kind of centralized storage deployed in various ways, including purpose-built NAS Drive and converted older systems.
Popular NAS Drive manufacturers include Synology and QNAP, but TrueNAS is an excellent solution for configuring a bespoke NAS Drive. In this article, we’ve discussed these and other types of NAS Drive and typical setup and configuration procedures for NAS Drive systems.
Network Attached Storage Types NAS Drive
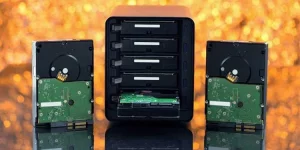
A NAS unit is often a customized, file-sharing-optimized PC with multiple RAID- or similar-configured storage discs. The drives (mainly HDDs) are often built for usage in NAS Enclosures, whereas the NAS Drive utilizes file-sharing protocols such as SMB, NFS, etc.
Dedicated NAS Drive and do-it-yourself NAS construction account for most of the market share. There are configurations like old PCs converted as NAS, routers with USB ports, and Raspberry Pi NAS, but these are highly specialized and not worth discussing in depth.
In the parts that follow, we will instead discuss those that are significant from a practical standpoint.
Dedicated NAS Hardware
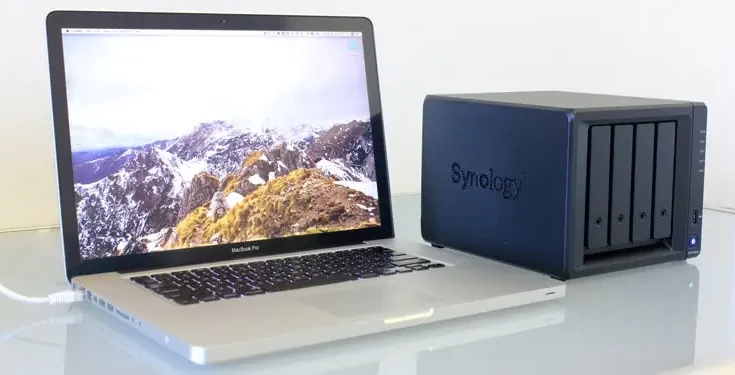
Purchasing an off-the-shelf NAS Drive offers advantages and disadvantages, but it is unquestionably the most convenient alternative.
Pre-populated NAS systems are the simplest to set up since only the software configuration has to be managed.
If you solely choose a NAS enclosure, creating and maintaining the system will involve more work. Still, you’ll have more flexibility for customization because you’ll be able to select the drives.
Depending on the vendor from whom you purchased your NAS Drive, the operating system installed on the device and the entire setup procedure will differ; nevertheless, we’ve listed generic instructions relevant to the most prominent suppliers below.
DIY NAS Builds
On the opposite side of the spectrum, you can opt for a DIY build if you want complete control over the components of your system.
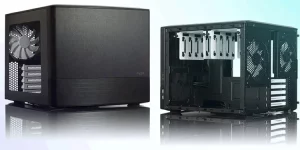
You must procure the NAS chassis, motherboard, cooling system, hard drives, and other components.
NAS Drive enclosure case
It provides you discretion over whatever aspect of the system to spend the most money on, as some individuals care about aesthetics. In contrast, others worry about storage space and technology.
In contrast to purpose-built NAS Drive that utilize proprietary operating systems, DIY builds let you select the OS. TrueNAS (formerly known as FreeNAS), XigmaNAS, and OpenMediaVault are examples of well-liked alternatives in this category (OMV).
The capacity to personalize is unmatched, but this also means that DIY construction takes some technical expertise, and a learning curve is associated with its use.
Other NAS Variants
As noted, there are highly specialized NAS kinds, such as Raspberry Pi NAS. However, it is not worth delving into them in this article owing to their limited utility. Even an old PC may be used as a NAS, a practice that, while traditional, is extremely common.
Although this sort of NAS Drive usually does not require installing a specialist operating system, installing TrueNAS on the device is ultimately the best solution, assuming the hardware specifications are enough.
Configuring A NAS Drive
We propose PCPartPicker and the NAS Killer Builds if you’re still deciding which components to utilize for your NAS Drive. Once the components are assembled, the first step is configuring the hardware.
Physical Configuration
Dedicated NAS Units require just the connection of power and LAN connections. After powering up the NAS Drive and connecting it to the same router as your PC, you may use the PC to configure the software.
If you purchased a NAS Drive Enclosure, you must first put the hard drives into the drive bays. Following this, the procedure is the same as explained previously. As seen, prefabricated modules are pretty simple to install, but the same cannot be accurate for a do-it-yourself project. In this instance, the components (RAM, CPU, etc.) should be installed into the motherboard first. Install other components, such as the power supply unit and cooling system, after mounting the motherboard to the NAS Drive chassis.
After the storage discs have been fitted, the final step is to turn up the system and verify that everything is functioning as planned. Due to the variable nature of the components for do-it-yourself construction, we recommend consulting the handbook for each element for precise installation instructions.
Application Configuration
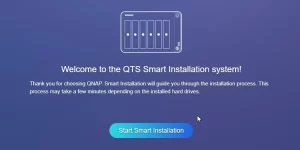
With Dedicated NAS Drive, if the device is turned on, you may remotely install the operating system using vendor-specific tools such as Synology Assistant or QFinder Pro. Typically, for do-it-yourself builds, you’ll download your desired operating system’s ISO and burn it to a DVD or USB using software like Rufus or Etcher.
The USB may then be connected to the NAS Drive and used to boot. You may either attach a monitor and keyboard to the device or remotely access it through SSH, IPMI, or iDRAC.
During installation, you are often required to pick the disc to install the operating system, create the root account, and configure other minor options. With dedicated NAS Drive, you should now access the NAS administration tools. With TrueNAS, however, you must first enter the web console using the supplied IP address.
Post Install Configuration
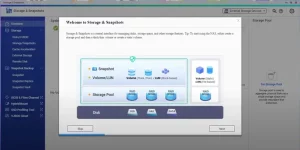
After the initial configuration, you should log in to the root account you generated previously to access the NAS Drive Management tools. The subsequent step is configuring a storage pool and disc volume(s). The storage pool is the total capacity of the discs in your NAS configuration, as suggested by its name. You will be able to pick which discs and RAID level to utilize.
ALSO SEE: NAT Type Failed on PS4 Error
Popular RAID configurations include RAID 1 and 5 and proprietary RAID variants such as SHR (Synology Hybrid RAID) and RAID-Z. (ZFS).
Each has advantages and disadvantages, focused on redundant data, enhanced performance, or a combination of both.
Create a single volume or many volumes if you want particular books to be available to just certain people. Then, you may configure the access rights for shared folders. You may now access the files in these shared folders using the file explorer on your local PC.
ALSO SEE: Jailbreak a Firestick and Stream Safely (2022)
By default, the accessibility is restricted to the local network only. Configuring remote access for your NAS Drive is possible using technologies such as Quick Connect (Synology) and myQNAPcloud (QNAP).
At this time, the configuration of the critical components is mainly complete. For more options, we recommend enhancing the security of your NAS Drive by creating several user accounts, limiting access restrictions, and installing security software. You should also do diagnostic tests and configure notifications to advise you of disc health and events such as limited disc space and NAS Drive failure.